
This lesson is made with PSPX9
But is good with other versions.
© by SvC-Design
Materialen Download :
Here
******************************************************************
Materials:
achtergrond.jpg
Alies 71-Bloemen-13062009.psp
Astrid masker 51.PspMask
Astrid masker 51a.PspMask
Betsie 949-08-09-2012.psp
Gerry-Dieren 64 - Vlinder - 27 juli 2009.psp
KittyS-Bijz409.psp
Tube3248_On_the_Boardwalk_by_Chr_.psp
******************************************************************
Plugin:
Plugin - convolution filters - enboss strong
Plugin - Unlimited 2.0 - &BKg designer - se shiver
Plugin - unlimited 2.0 - graphic plus - cross shadow
******************************************************************
color palette
:

******************************************************************
methode
When using other tubes and colors, the mixing mode and / or layer coverage may differ
******************************************************************
General Preparations:
First install your filters for your PSP!
Masks: Save to your mask folder in PSP, unless noted otherwise
Texture & Pattern: Save to your Texture Folder in PSP
Selections: Save to your folder Selections in PSP
Open your tubes in PSP
******************************************************************
We will start - Have fun!
Remember to save your work on a regular basis
******************************************************************
1.
Open a new transparent image of 800 X 550 pixels
Selection - Select All
Open achtergrond.jpg
Edit – Copy
Edit - Paste into selection
Selection - Select None
Open Tube3248_On_the_Boardwalk_by_Chr_.psp
Edit – Copy
Edit - Paste as new layer
Stretch the tube over the entire width of your work surface.
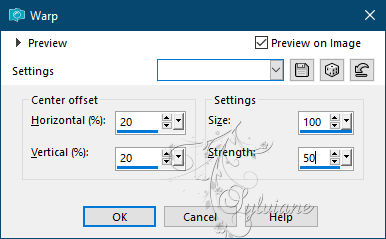
Effects - Distortion Effects - warp
2.
Layers - New Raster Layer
Fill the layer with background.
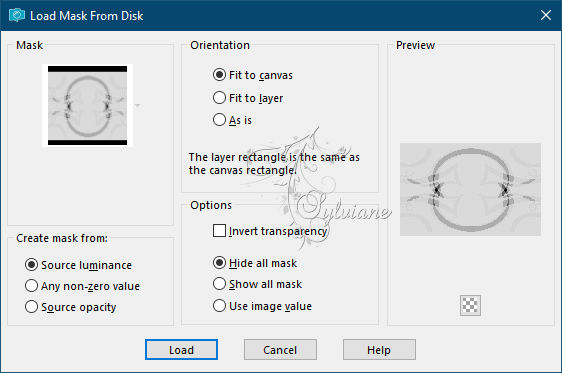
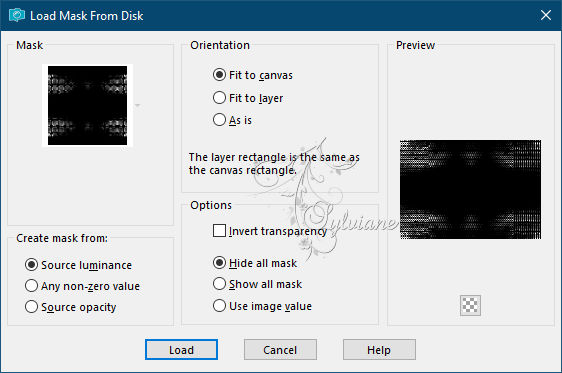
Layers – Load/save mask – Load mask from disk - Astrid masker 51a.PspMask
Layers - Merge - Merge Group
Effects - Edge Effects - Enhance
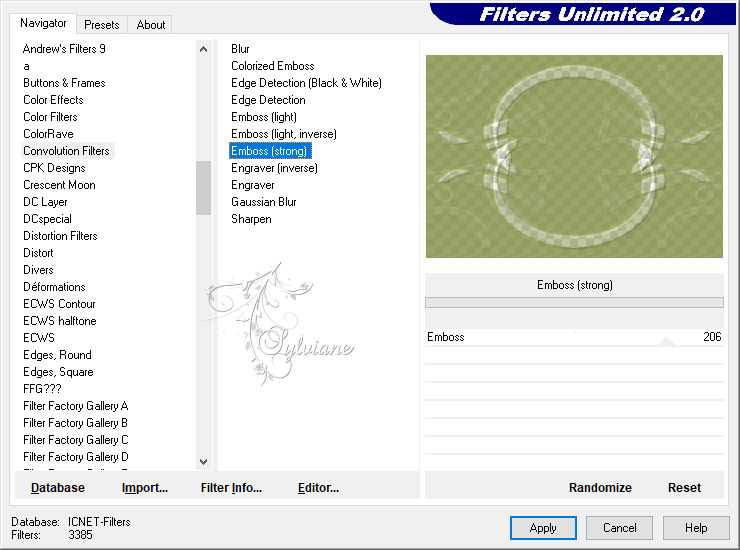
Plugin - convolution filters - enboss strong
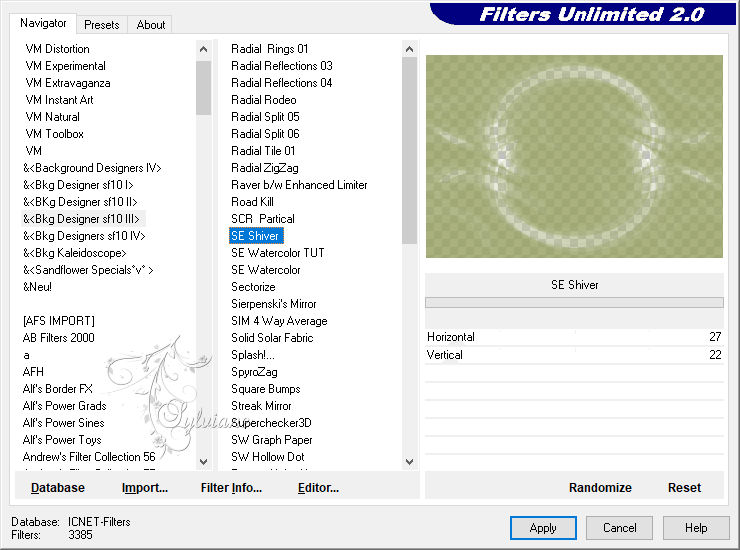
Plugin - Unlimited 2.0 - &BKg designer - se shiver
Layers - Duplicate
Image - Mirror - Vertical Mirror
Layers – merge – merge down
3.
Layers - New Raster Layer
Make your foreground a gradient :
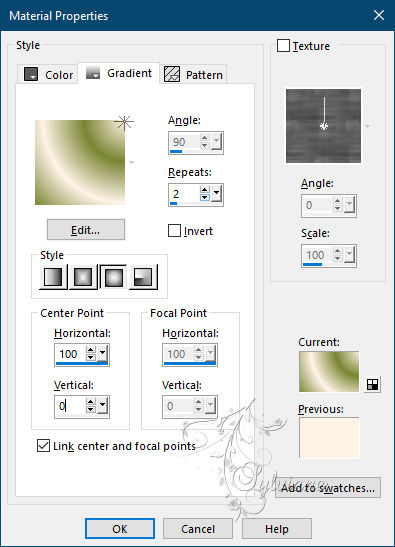
Fill with gradient.
Close the top layer.
Activate the 2 nd layer.
Layers - Merge - Merge visible layers
Open the top layer and activate.
Layers – Load/save mask – Load mask from disk - Astrid masker 51.PspMask
Layers - Merge - Merge Group
Effects - Edge Effects – Enhance
4.
Layers - New Raster Layer
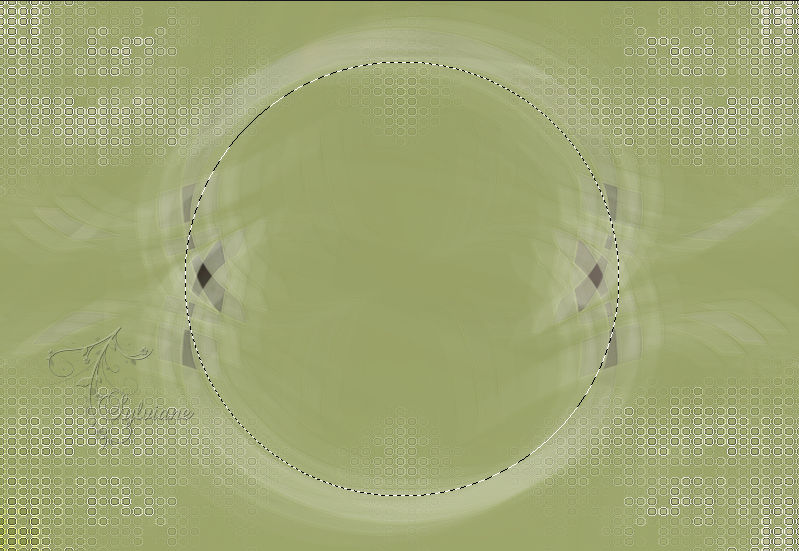
Make a selection with your basic oval shape:
Open KittyS-Bijz409.psp
Edit – Copy
Edit - Paste into selection
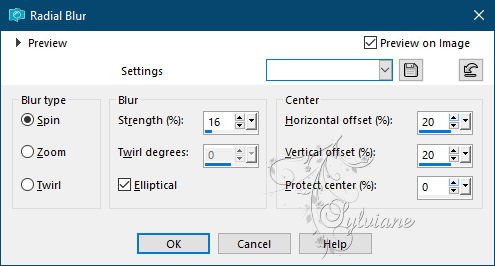
Adjust - Blur - Radial Blur
Selection - Select None
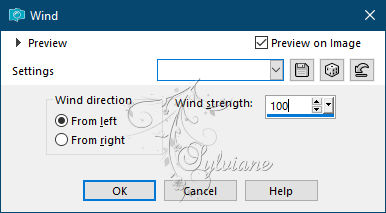
Effects - Distortion Effects - Wind
Layers – Duplicate
Image - Mirror - Vertical Mirror
Layers – merge – merge down
Layers – Duplicate
Image - Mirror – mirror Horizontal
Place the layers side by side.
Layers – merge – merge down
5.
Open KittyS-Bijz409.psp
Edit – Copy
Edit - Paste as new layer
Set the layer opacity to 24.
Blendmode: multiply.
Adjust – scharpness – scharpen
6.
Open Betsie 949-08-09-2012.psp
Edit – Copy
Edit - Paste as new layer
Resize 80%, all layers unchecked.
Put them right.
Effects - 3D effects - Drop shadow
10/10/40/30 color:#000000
7.
Open Alies 71-Bloemen-13062009.psp
Edit – Copy
Edit - Paste as new layer
Image - Mirror – mirror Horizontal
Set her as in my example
Effects - 3D effects - Drop shadow
10/10/40/30 color:#000000
Adjust – scharpness – scharpen
8.
Open Gerry-Dieren 64 - Vlinder - 27 juli 2009.psp
Edit – Copy
Edit - Paste as new layer
Resize 50%
Effects - 3D effects - Drop shadow
10/10/40/30 color:#000000
Adjust – scharpness – scharpen
Layer – merge – merge all (flatten)
Adjust – scharpness – scharpen
Image - Add Borders -2 pix - color: background.
Image - Add Borders -50 pix - color: foreground..
Select the last edge with the magic wand.
Fill with gradient.
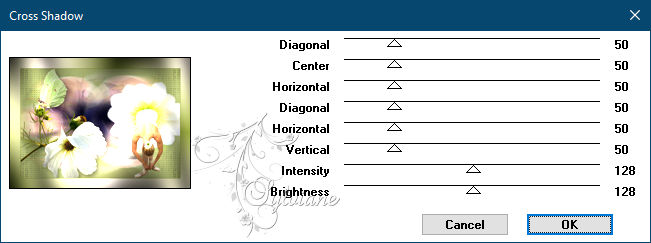
Plugin - unlimited 2.0 - graphic plus - cross shadow - default
Selection - Select None
Image - Add Borders -2 pix - color: background
9.
Put your name or watermark .
Make your creation 600 pix longest side .
Save your work as JPG.
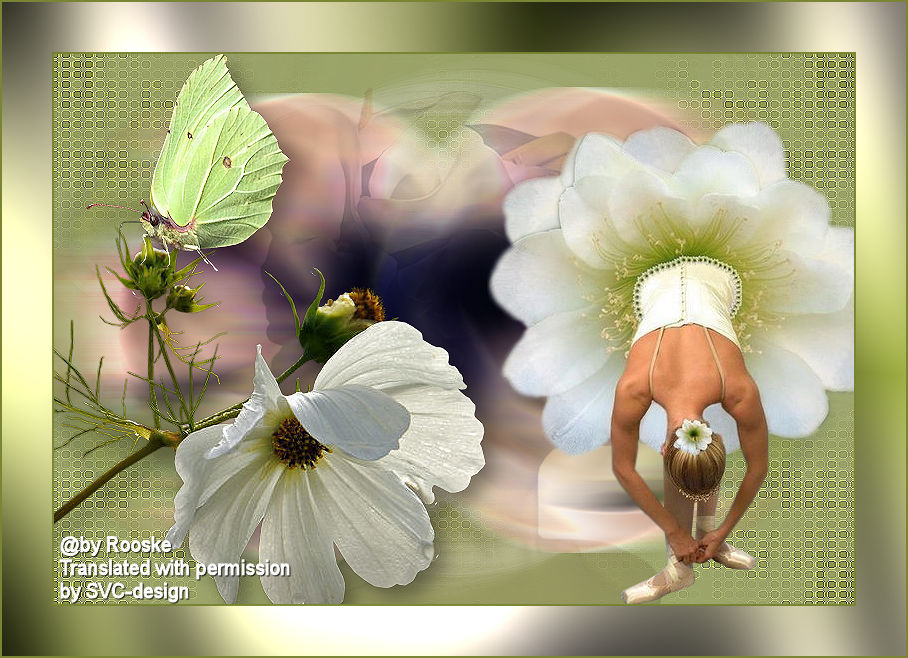
Copyright Rooske
Back
Copyright Translation © 2021 by SvC-Design